

Condition records a property room by room and element by element. Everything starts from a template, which sets the rooms and elements you walk, the grades you can give, and the reports you can produce. This page gets you from an empty app to a property ready to walk.
Choose a template
Four templates are built in. Pick the one that matches the job; you can add, rename or hide anything on site.
- Residential inventory: for check-in inventories and check-outs. Rooms have doors, walls, ceiling, floor covering, windows, lighting, sockets, heating, fixtures and contents, plus keys, meters, alarms and appliances for the property as a whole. Grades are Excellent, Good, Fair and Poor, with a separate cleanliness grade. Produces the inventory and check-in report and the check-out comparison.
- Commercial schedule of condition: for schedules attached to a lease and dilapidations at the end of it. Rooms, elevations (north, east, south, west) and external areas, graded Good, Fair, Poor or Defective. Produces the schedule of condition and the dilapidations comparison, with liability and cost.
- Interim inspection: a lighter walk of an existing record, for mid-tenancy checks. Everything starts as unchanged and you record only what differs. You start one from the property, not as a new property; see Interim visits.
- Party wall record: for the adjoining owner's rooms nearest the works. Walls, ceiling, floor, cornice, windows, doors and each existing crack as its own element, graded Sound, Hairline, Cracked or Damaged. Produces the pre-works schedule and the post-works damage comparison.
Create the property
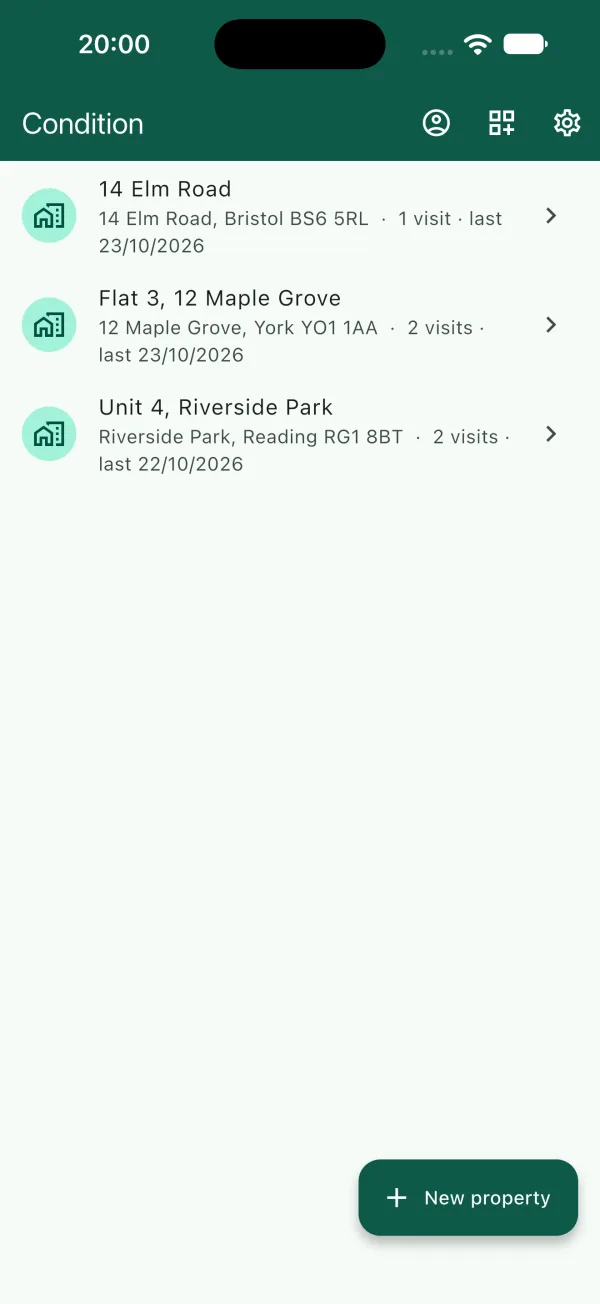
- On the property list, tap New property.
- Choose a Template. A line underneath says how many rooms it starts with and which grades it uses.
- Type a name, for example "Flat 3, 12 Maple Grove", and optionally the Address, Client and Reference. These print on the report cover.
- Tap the tick to create it. The property opens, ready for its first visit.
To change the name, address, client or reference later, open the property and choose Property details.
What the template gives you
The template creates the areas (rooms, elevations, outside space) and, inside each, its elements. The order of the list is the order you walk, and the order the report prints. You can add a room or an element, rename either, or hide anything the property does not have, so a one-bedroom flat does not carry a second bedroom through every report. See The walk.
Each visit keeps its own copy of the template's vocabulary, so a check-out recorded next year uses the same words and grades as the check-in it compares against, even if you have edited the template since.
Your own templates
Built-in templates cannot be edited directly, but you can copy one and change the copy.
- On the property list, tap the templates icon at the top.
- Tap a built-in template and choose Duplicate & edit. The copy appears under Your copy.
- Rename it, and change its rooms, elements, grades and wording.
- When you create a property, choose your copy as the template.
Export file saves a template to Files so a colleague can bring it in with Import template file.
Your name and company
Tap the settings icon on the property list and fill in Your name and Company. They pre-fill each new visit and the first signature, and print on the report. A logo for the report cover is set from the account screen and needs Pro; see Your logo and credit line.